Basic instructions to start using the API
Basic instructions to start using the API right way
Step by Step
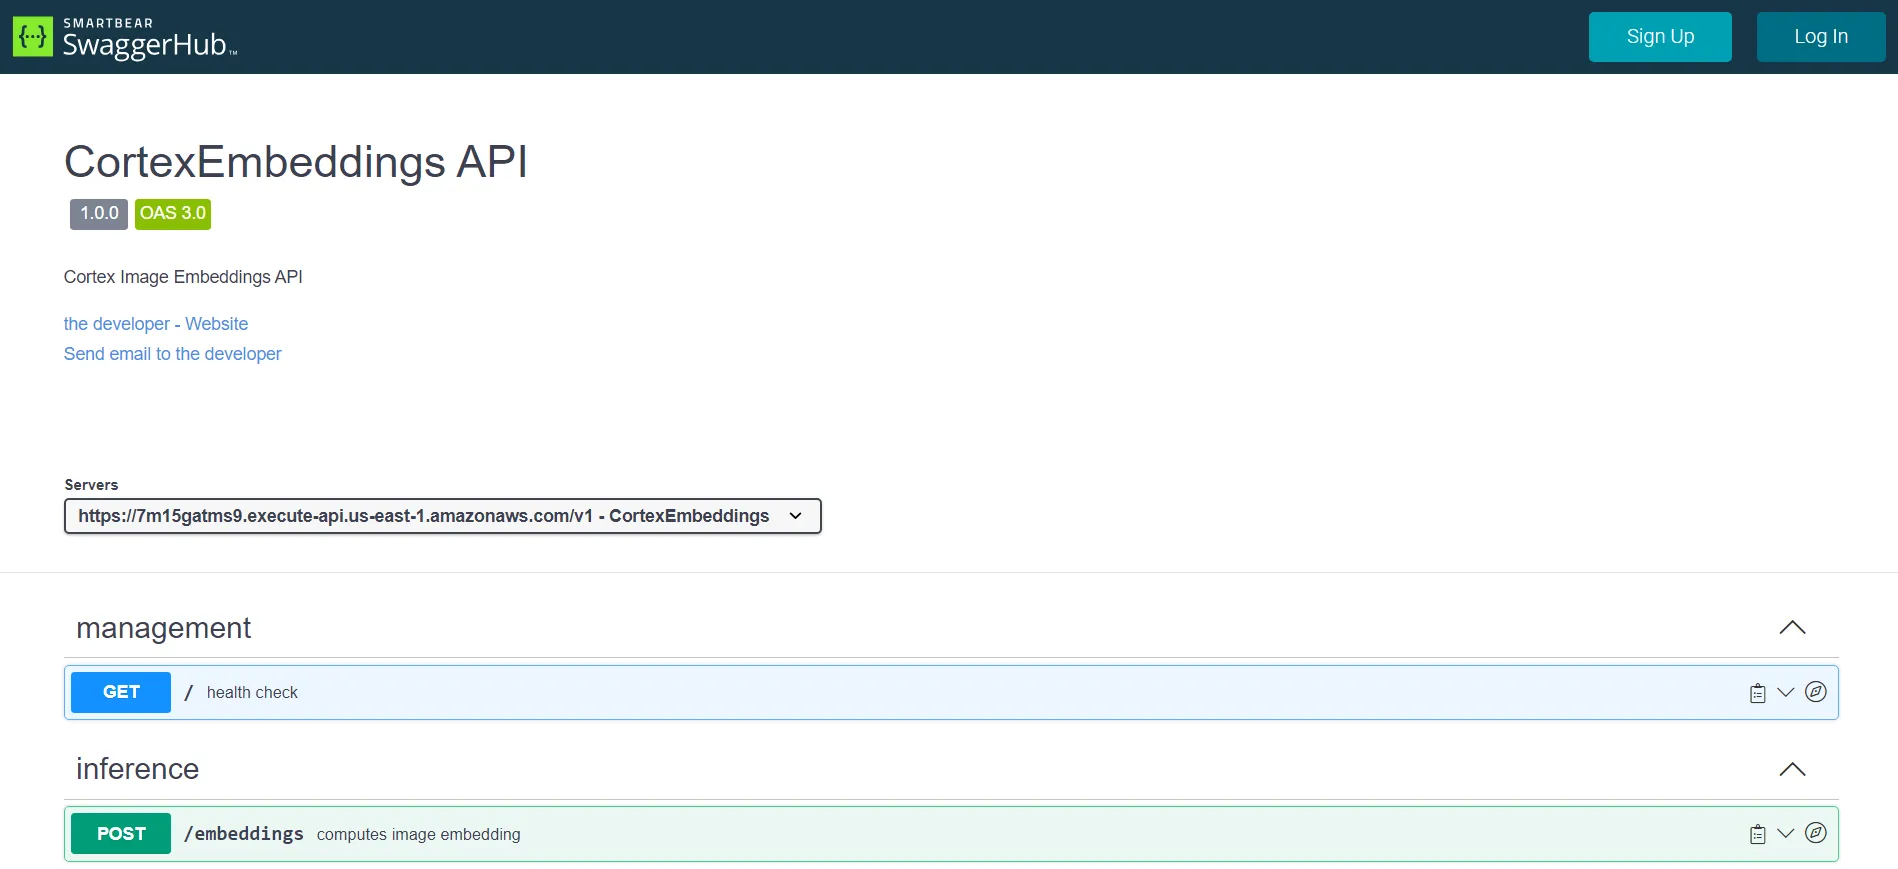
To access cortex embeddings follow this Link. The following window will be displayed:
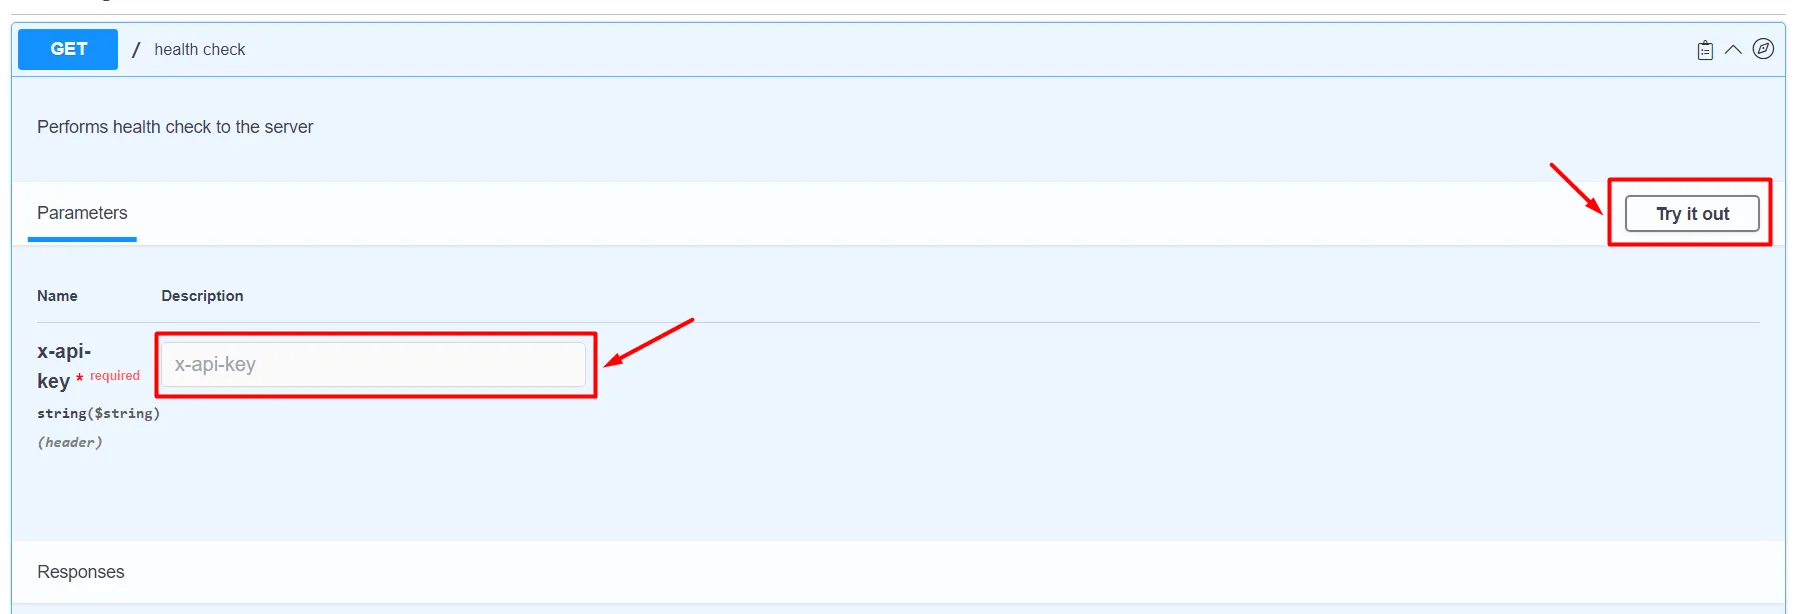
Drop down the “GET” option in management, click on “try it out” and then insert the provided api-Key
Click on the “Execute” option that will appear after clicking on “try it out”
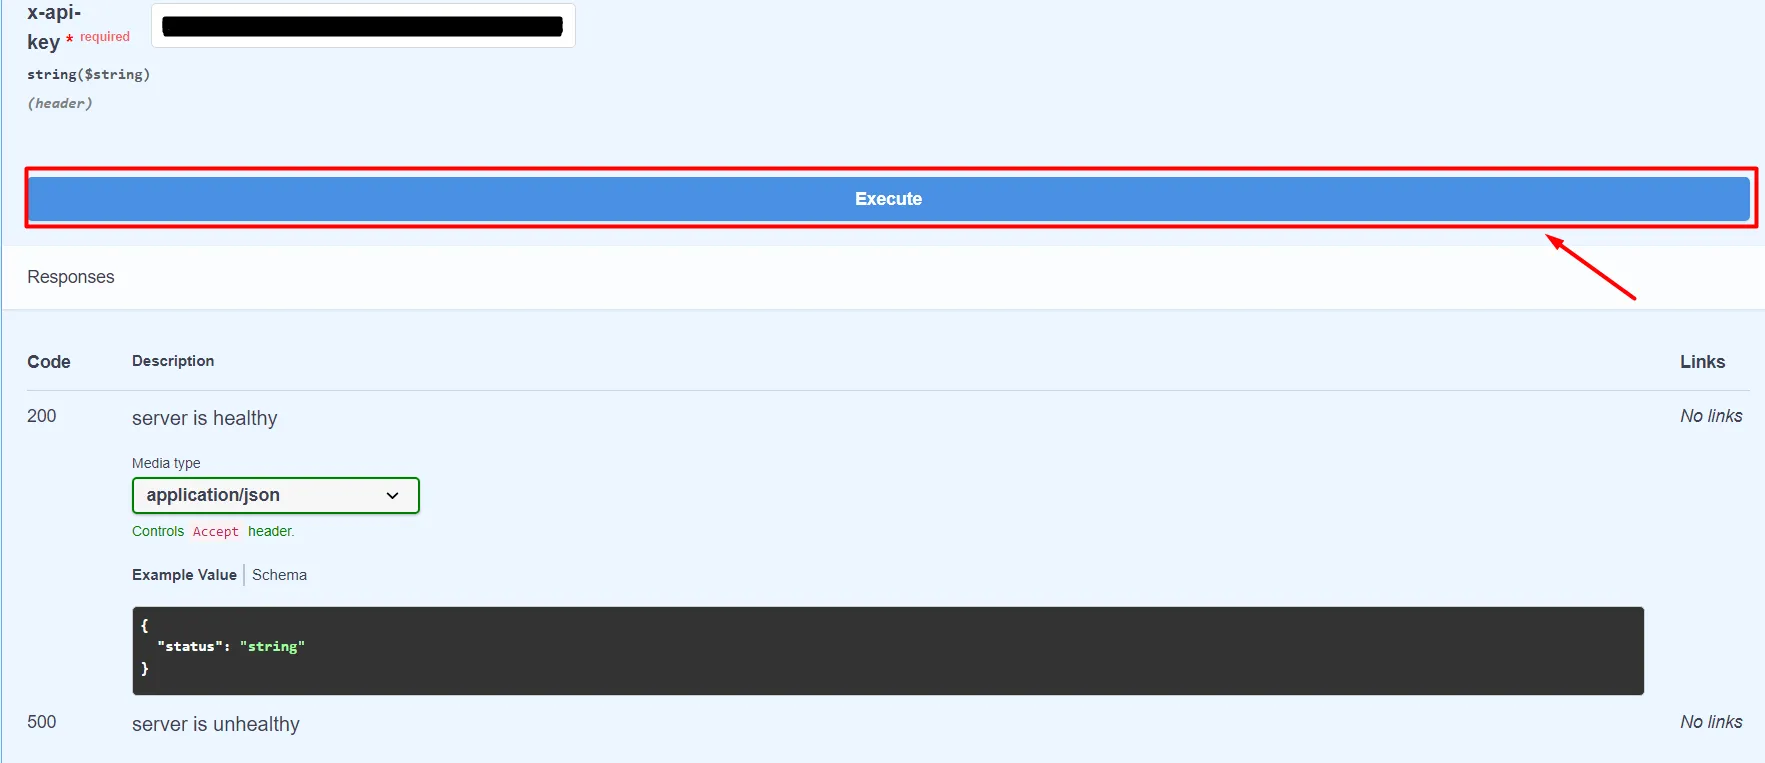
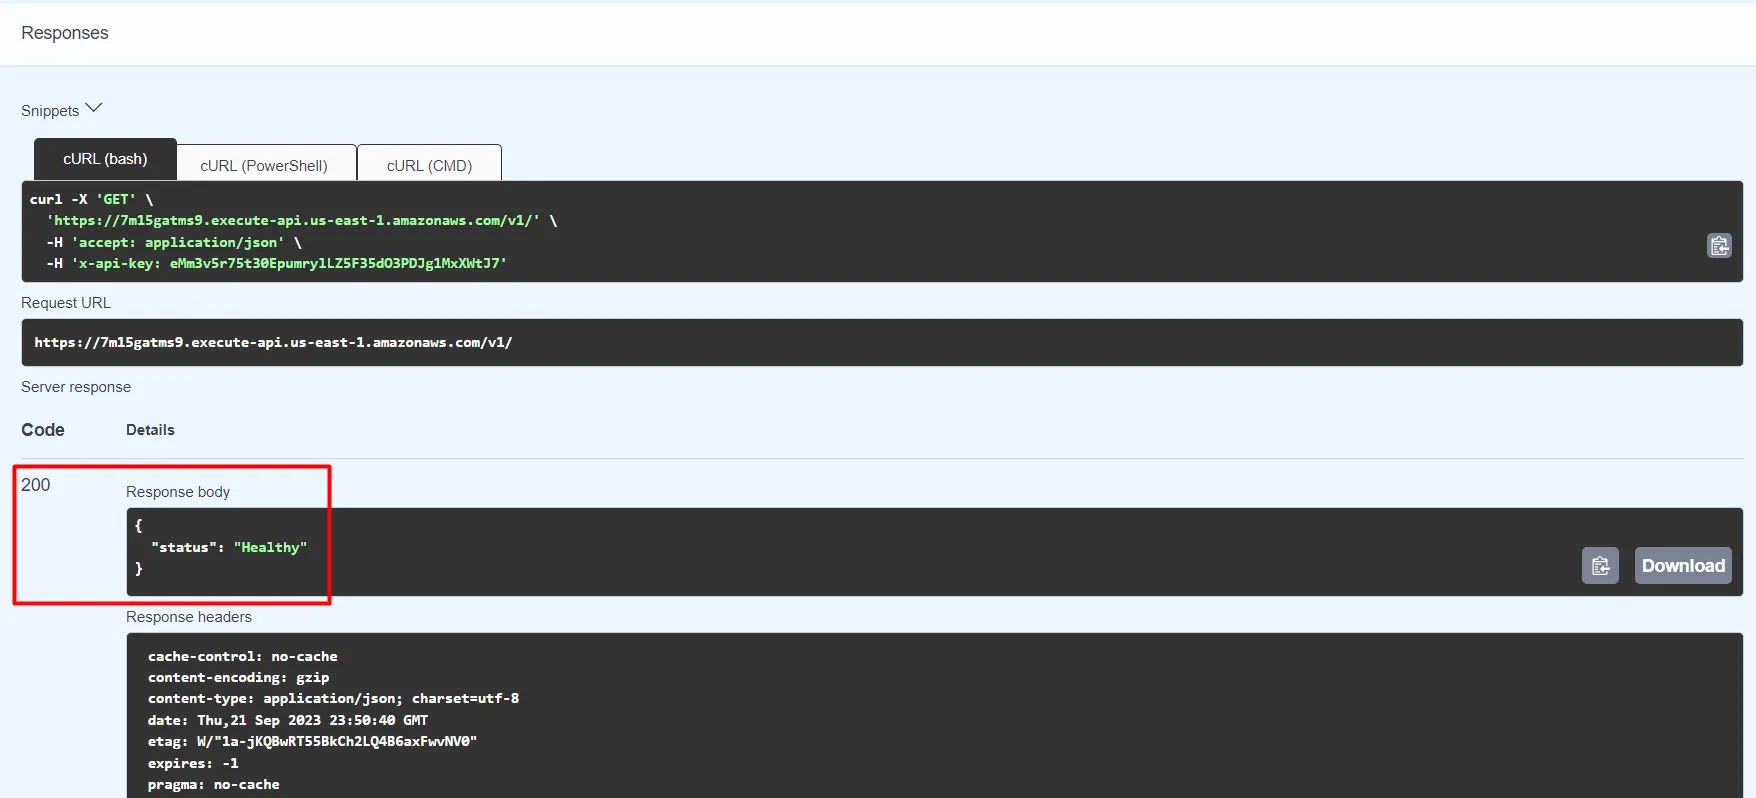
After clicking execute, the “responses” section will change. It is important to verify that the status is set to “healthy”. It is important to note that if you get the code 500, you should contact the support team.
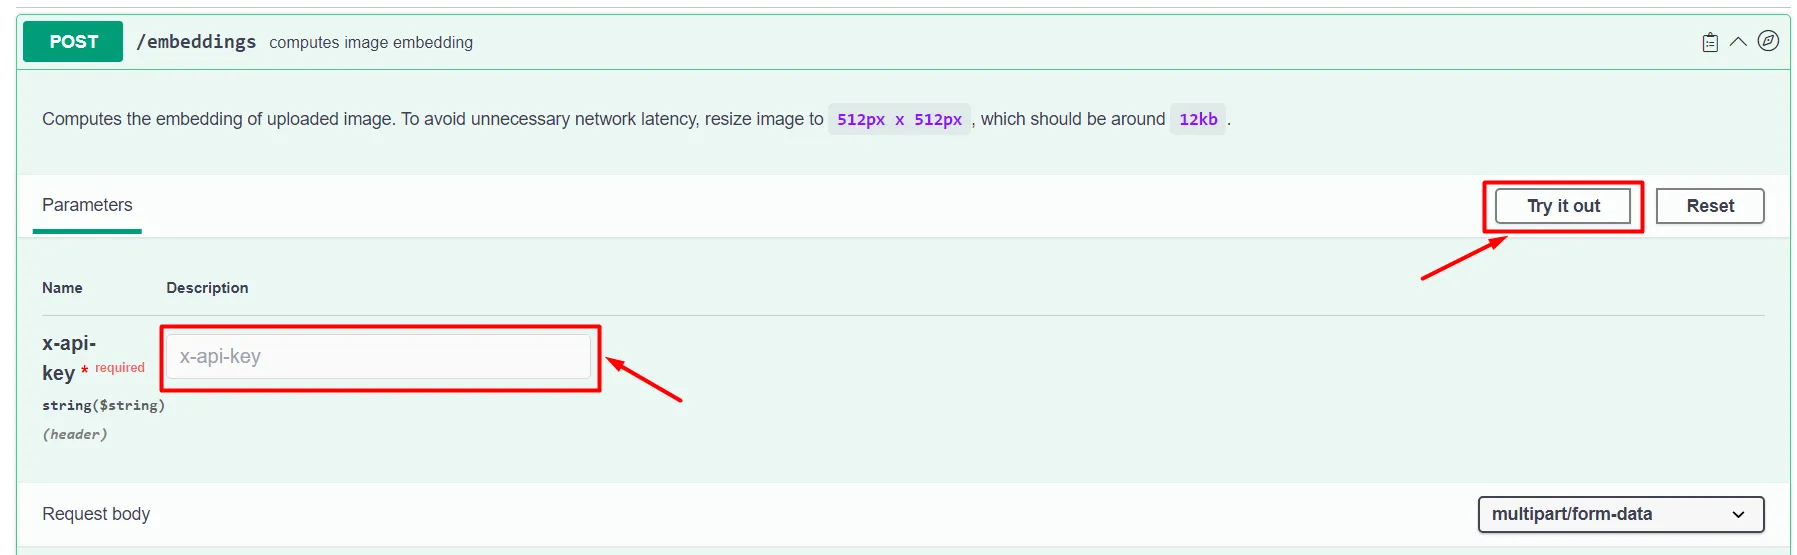
Then you must deploy the “POST” option, select “try it out” and enter again the provided Api-Key
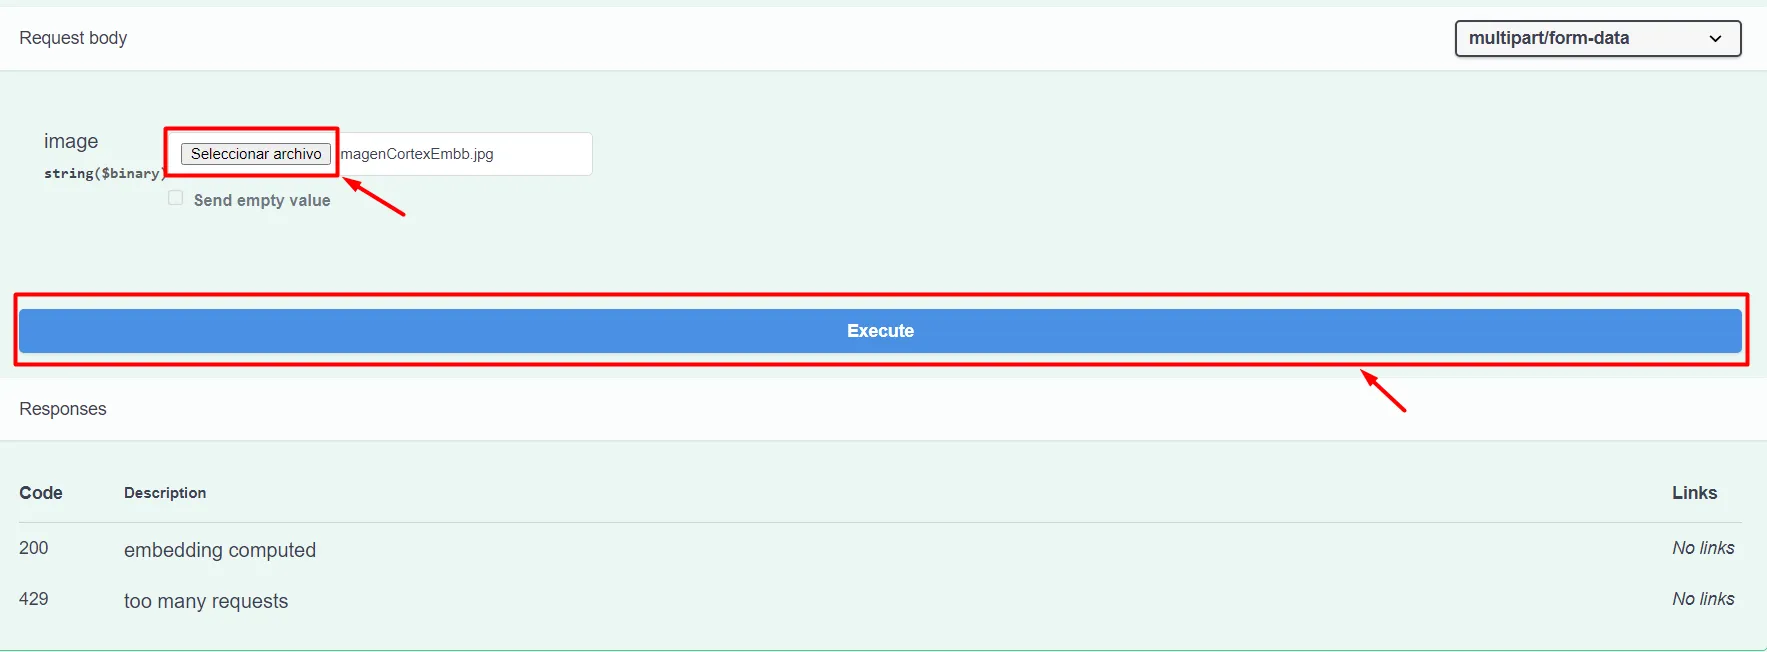
Select the image file (must be at most 512x512 pixels) you want from your computer and then select “Execute”
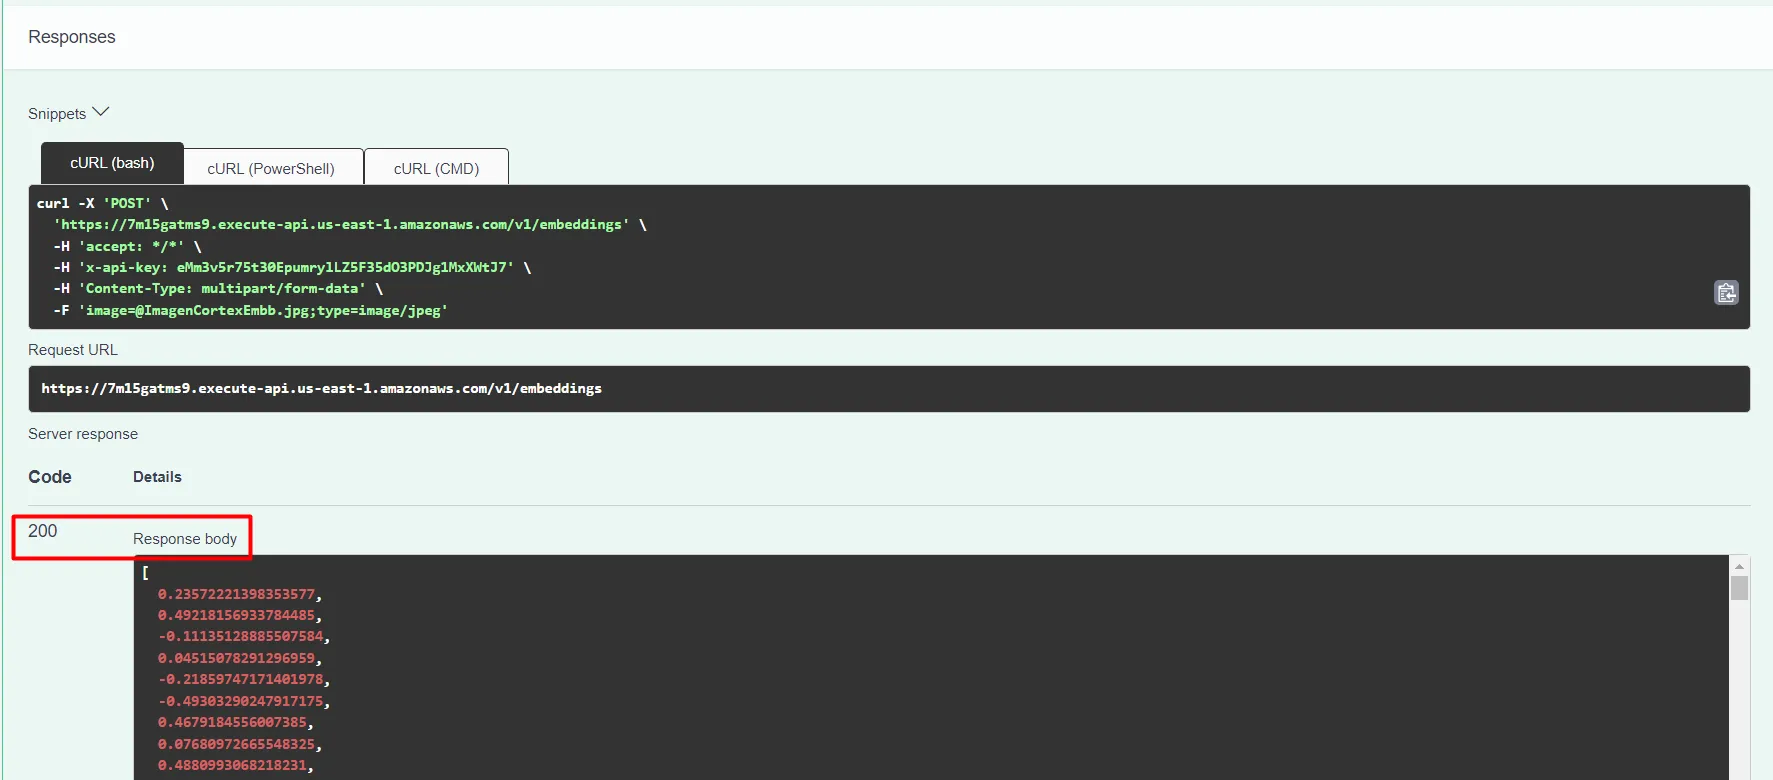
Finally verify that the code 200 is received as this indicates that the embedding has been processed. In “Response body” you will get the vector.
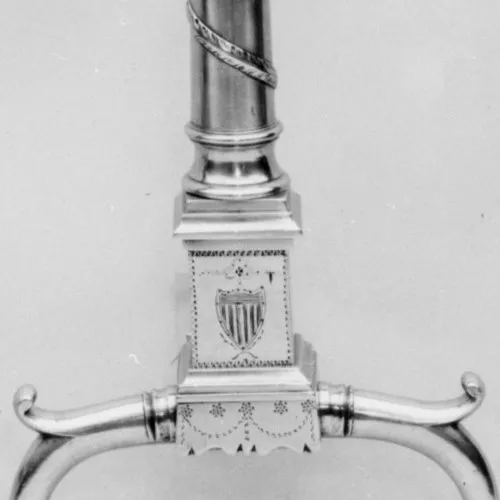
Examples:
Input Image
Output Vector
[
  0.23572221398353577,
  0.49218156933784485,
  -0.11135128885507584,
  0.04515078291296959,
  -0.21859747171401978,
  -0.49303290247917175,
  0.4679184556007385,
  0.07680972665548325,
  0.4880993068218231,
  0.6217859983444214,...]